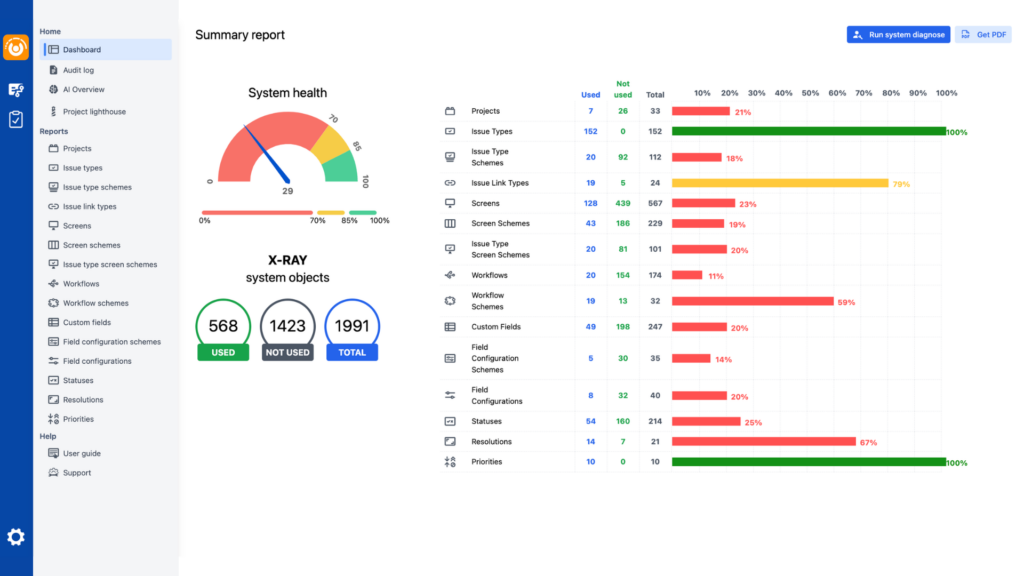
Managing a Jira instance means keeping things clean, organized, and efficient, but tackling a full-scale cleanup can feel overwhelming. By breaking down the process into just four key steps—and leveraging powerful features in Doctor Pro for Jira —you can streamline and simplify your cleanup while enhancing performance, usability, and even license efficiency.
Step 1: Set the Stage with Preparation
Effective preparation is the foundation of a successful Jira cleanup. Start by:
- Creating a Test Environment: Set up a sandbox environment to experiment safely without affecting live data.
- Planning & Communication: Share your cleanup plan with your team, align it with ongoing projects, and provide clear timelines to keep everyone in the loop.
- Access Control: Limit admin access to prevent unauthorized changes, ensuring only necessary users have permission to update configurations.
Doctor Pro Pro Tip: Use Doctor Pro’s health check to review your Jira instance for areas needing improvement, offering specific recommendations to streamline your cleanup plan.
Step 2: Identify Key Areas for Improvement
Now that you have a plan, it’s time to pinpoint where your efforts will have the most impact:
- Audit and Document: Go through configurations like custom fields, workflows, and permissions, identifying areas for simplification or optimization.
- Leverage Language Analysis: Doctor Pro’s PyTorch-based algorithms analyze language usage, detect similarities, and flag duplications, helping you consolidate and simplify issues, comments, and workflows.
Doctor Pro Pro Tip: Doctor Pro’s audit tools and language analysis make it easy to locate inefficiencies and redundant items, prioritizing high-impact areas. The built-in health check provides a comprehensive view of your instance’s structure, pinpointing configuration issues at a glance.
Step 3: Execute the Cleanup
With target areas identified, it’s time to start the actual cleanup:
- Start with Quick Wins: Tackle simple changes first, like removing unused fields or merging workflows. These small updates can quickly improve usability.
- Reduce License Counts: Doctor Pro’s User and License Management functionality identifies inactive accounts or duplicated users, allowing you to free up licenses and reduce costs.
- Leverage Bulk Actions: Doctor Pro lets you batch-update, merge, or delete items in bulk, saving time and reducing manual effort.
Doctor Pro Pro Tip: Doctor Pro’s bulk actions make it easy to handle large-scale cleanups and optimize license usage. Identifying and deactivating unnecessary accounts helps reduce your overall license count without compromising functionality.
Step 4: Embed Long-Term Maintenance & Optimization
Cleaning up is just the beginning—ongoing maintenance is essential for keeping Jira organized over time:
- Establish Standards: Create user guides, training materials, and a change management protocol to promote sustainable cleanup practices.
- Regular Check-Ins: Schedule periodic reviews to spot potential issues before they grow. Doctor Pro can send alerts on configuration health, helping you stay proactive.
Doctor Pro Pro Tip: Use Doctor Pro’s real-time insights to monitor your Jira setup and keep it optimized. Automated notifications for configuration health and user activity help you stay on top of maintenance and license efficiency with minimal effort.

Ready to Transform Your Jira Instance?
By following these four steps—and using Doctor Pro for Jira’s advanced features—you can simplify the cleanup process, optimize license usage, and gain actionable insights with language analysis. Want to learn more? Visit Appforge.ai and check out our documentation to discover more ways to streamline and enhance your Jira environment effortlessly!


